Wednesday, 9 November 2011

Loafing around

Actually I've been quite busy kneading away in North Norfolk.


Do you remember my long-winded attempt to create my own sour dough?
There had to be an easier way, so ..... I decided the best thing was to join Virtuous Bread for a one-day course in north Norfolk. What a lot I learned.
Rosie, our fab teacher, is in action below creating her wonderful artisan bread (which if you're living in London will set you back £4 a loaf).


Anyone interested in getting stuck in to some dough work should definitely contact her.
Among the many things I discovered, there is nothing like getting your hands covered in wet rye dough to really understand what making sourdough is all about.

 My fridge now has 3 different pots of gloop, so I'm never going to be stuck for a starter. They have varied characteristics, ranging in age from 1851, through to 2000 and my very own 2011 vintage.
"Beer and bread are the midwives of civilisation"
There are more than just crumbs on offer at this particular table!


Friday, 4 November 2011

What if .........?

What if you feel like you are stuck in a rut?


Leo at Zen Habits has written a great post on "The Rut, & the Way Out"
This left me asking myself a few "What if?" questions this morning in bed & provided some much needed momentum.

Sometimes I have such a lack of motivation that lethargy just takes over. 
Setting goals etc is ineffective, telling myself to shake up doesn't work and all I can see is the mountain of things to do. 
Leo has a great starting point if you are at this same spot with me.
Ask yourself a few "What if?" questions. 
No action required just ask the the question.
 I tried that in bed at 6am today and these were my posers:
  1. What if I decided to write in my journal every day for the rest of this month? Yes, I want to do this, I want to get back to writing creatively. No excuses. See I am doing this as I sit here.
  2. What if I sew one stitch (minimum) everyday? I cleared my sewing table yesterday, so it's all set.
  3. What if I did 5 minutes yoga every morning? Well, that is a bit more radical for me ... but I like the thought and it doesn't mean I have to do headstands.
Leo goes on to ask more scary "What if's?" such as:
"What if your life was a blank slate and you could fill it with only things you love?" and "What if you tossed out all your excuses?" and "What if you tossed out your to do list and only did one important thing each day before doing less important tasks?"
I find it helps being invited to think differently about my set ways.

If you want to go further, you should announce a major challenge. Just announce it.
Here goes:
 "I am going to challenge myself, Ingrid, to write and publish 3 blog posts a week for the next month."                                                                                  You'll know if I keep to it!

Saying it aloud creates a momentum and I feel committed.
Here is the blog that proves it - if you saw all the draft blogs I half write and never get round to publishing, you'd know how easy it is for me to leave things unfinished!

Hope you read Leo's post and hope it helps if you, too, are in a dip.
Me? I'm off to do 5 minutes yoga, no time like the present. Maybe later sew something for the table ... after all that is what this blog is supposed to be about.

Wednesday, 26 October 2011

D.I.Y. Garnish

Sipping a well deserved cappucchino at Carluccio's the other day, after a long walk on Hampstead Heath, I clocked the simple table decor of terracotta pots of coriander and rosemary.
Image: Ingrid's iPhone
It is a simply brilliant idea for the table at home ... D.I.Y. Garnish.
Family and guests simply nip or snip off as much of the herbs as they desire and add straight to their own dish. Could anything be easier or tastier?
Just pick up a couple of herbs in the supermarket and add them to pots, terracotta or otherwise and you are all set.
After the meal you may want to move the herbs to a windowsill for a dose of sunshine, if sun's rays do not stretch as far as your table. Of course all living plants need water too - obvious but strange how many times I seem to forget this basic fact!

Herbs for the table: coriander (cilantro to some), chives, rosemary, french parsley or oregano for starters.

Mosaic made with images from Martha
For a bit of fun add a little felt bird  or mouse!
But best to keep these herb pots inside if you don't want an unwelcome snail at your table.

Monday, 10 October 2011

Bringing home the Bacon

Let me take you on a little trip, through the narrow country lanes of mid Suffolk, to a shop that is almost good enough to eat.
 Our destination: Emmett's of Peasenhall.


Although it was my first visit, plenty of esteemed foodies like Rick Stein, Delia Smith and the late Queen Mother, no less, have extolled the merits of the delicious hams and bacons available here. Whether it is black cure, mild cure, orange cure or Christmas cure - all the pork comes from pigs that are reared outdoors, on one of four local Suffolk farms, and cured in-house. 
In fact, Emmett's have been curing hams and bacon on the premises for more than 200 years.

If you are not in the neighbourhood, don’t despair - the online shop will help you bring home the bacon with just a few clicks.

But ... be sure there is nothing to replicate the sensory delights of walking over the threshold of this quintessential English food shop. 
The tasting table that greets you is set with delicious tapenades, aromatic olive oils and chutneys to spice up your life. 
As we ventured further, we were in raptures over the giant 3kg slabs of chocolate - tasting it ensured  a sensible small piece made it home - had to leave the mega slab for another time.

But ... bacon was what we had come for and our sampler packs of lardons, sweet cure bacon and Suffolk ham have convinced us that from now on, Emmett’s is our default bacon source. I challenge anyone to not taste the difference, whether it is in a quiche lorraine with lardons or a sourdough bacon sandwich (both of which I cooked for the family in the days that followed)


Be sure to allow time to sample the lunch menu on offer in Emmett's cafe - our Suffolk ploughman’s platter was delicious and introduced us to the heavenly date and lime pickle, from Sri Lanka no less. The enormous Emmett’s salad was bounteous and filled with every goody from the deli - ham, nectarine slices, olives, garlics, artichokes and fresh salad greens. (Good choice Alice and Astrid!) 

My Favourite buys:
~ Bacon lardons for your quiches, macaroni carbonara and soups for starters
~ Date and lime pickle for adding spice and zest to any cold plate
~ Promise you will not leave without indulging yourself with a small large piece of chocolate - up to you whether you plump for dark, milk or ginger filled.
Meeting Mark Thomas, the passionate owner and bacon guru, at the end of our visit was a special treat. Next time he has promised to show us the smokehouse where all the curing and smoking action happens.
With Christmas on the horizon you can order hampers or sampler packs as delicious gifts to make yourself or someone else  very happy. Or maybe drop a hint to someone close to you about your Christmas stocking this year!
Click here to view Emmett's catalogue


Thursday, 6 October 2011

Remembering Steve

Image: Getty Images
"Your work is going to fill a large part of your life, and the only way to be truly satisfied is to do what you believe is great work. And the only way to do great work is to love what you do. If you haven't found it yet, keep looking. Don't settle."
Steve Jobs, 1955 - 2011

Steve Jobs and Apple have had a huge impact on my life. From the first time I used a Mac computer back in 1992 I was a devotee. Starting with a LC computer and a memory of 40 megabytes, our basket of Apple's has grown and enriched our lives. 
Thanks Steve for all the creative possibilities you have brought to our family. 

If you have time do listen to Steve's 2005 commencement speech at Stanford - it says so much about the man and how he made a difference.


Tuesday, 20 September 2011

Four weeks to make a loaf

Ever thought about making sour dough bread?

It is a whole year since I bought the delectable Bourke Street Bakery recipe book, but the many pages of instructions on how to make a sour dough starter left me a non-starter. In my naiveté, I had imagined the stages would be: buy the book, make a yeasty mix, wait a couple of days and then have sour dough bread for ever more. How wrong I was!

Always on the look-out for a shortcut, I searched in earnest for a starter that I could buy instead of the four week long slog involved in creating a sour dough from scratch.

If I lived in the US, it would have been easy to spend $12 and have a starter mailed to me, but here in the UK I found just one vendor, and their website said they were on holiday for 3 weeks and could not send starter dough out till September.

Being impetuous,  I reached for the Bourke Street Bakery book again and decided that it couldn't be that difficult, so why not give it a go.
To cut a long story short, that was 4 weeks ago.

After an "intensive pregnancy", during which my sour dough grew vigorously, it finally gave birth to triplets. Making their debut... my home baked, Suffolk sour dough loaves.
Image: Ingrid's iphone
The unbiased verdict of the extended family and friends was a reassuring "delicious".

But I am still shell-shocked at how much work was involved. It's like feeding the dog: done daily or else there are complaints.
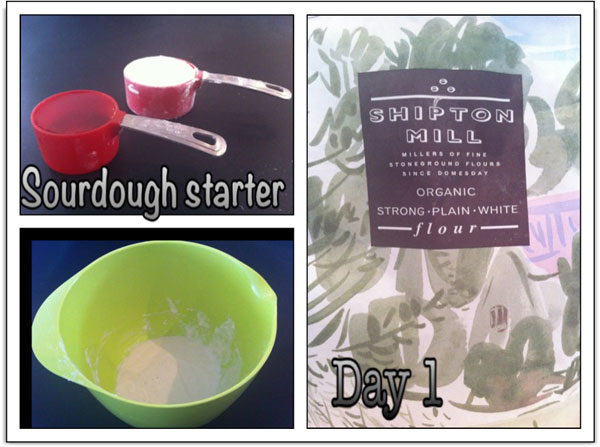
Image: Ingrid with iPhone and Strip designer
Back in August I started with one bowl, a packet of organic flour and filtered water.
Now, four weeks later I have loaves, a four-week old wild yeast starter begging to be fed and a family waiting for a new loaf.
If anyone is keen to try this for themselves I can supply the starter but you will had to come and collect it!

The basic principle is that by mixing strong flour and water together you can capture wild yeasts that are floating around in the air. Having captured your wild yeasts, you need to feed them daily with more flour and water.
This will double the size of your mix EVERY day. So after four days you either have to bin the excess or make sour dough pancakes (which are delicious).

This process is repeated on a daily basis for THREE weeks. After two weeks I nearly got in the bin...
And just when my flour was running low, I realised that the "greedy monster" had to be fed three times on the final day to make it strong enough to raise the dough.

Four hours after the last feed, it had to be knocked down, then placed in a fridge for 12 hours to retard it before taking it out and activating it again. Poor dough didn't know whether it was coming or going ... and neither did the baker.

The upshot is I have decided to go on a one-day course at The Virtuous Bread - there has to be an easier way to get my sour dough started!

If you have baked with sour dough and have any tips for a novice, I would love to hear from you!


Thursday, 15 September 2011

Best cupcakes ever

If you can't watch BBC television - you are missing a real treat. In fact I would venture to say, "You are missing the best show ever"...The Great British Bake Off.
I am so happy to be in England now that Series 2 is showing. 

To ease the distress of having to wait one whole week for the next episode, we started searching online for ways to keep baking feeling going. 
The Bakewell tart cupcake recipe ticked all the boxes for our first attempt from the BBC website.
Holly Bell inspired us to try her recipe, albeit our way - with less than perfect icing (sorry Holly).
Holly and Janet are my favourite contestants - hope they stay in till the final.

It was love at first taste. 
These Bakewell tart cupcakes are the easiest and tastiest we have ever made.


 Alice and Louise carefully scooped out a little hole in the centre, to be able to drop a tiny dollop of raspberry jam. Tilly was on hand to eat every little crumb that was removed - and let them know if they were not quick enough to supply her.


Twelve cupcakes quickly disappeared


Here is Holly's recipe with a couple of changes :


Raspberry Bakewell Tart Cupcakes
The mix:
75g margarine - at room temp
75g butter- at room temp
150g caster sugar
100g self-raising flour
3 free range eggs- at room temp
1 teaspoon baking powder
60g ground almonds
1 Tbsp milk

After baking:
good quality raspberry jam

Icing:
200g icing sugar
2-3 Tbsp lemon juice
12 raspberries

How to:

  1. Preheat oven to 180C/350F/Gas4. Use paper cases in a 12 hole muffin tin.
  2. Cream the margarine and butter in a bowl till light and fluffy. (I thought this was a typo as I always have creamed butter and sugar together first - but now I think this makes the cupcakes extra light)
  3. Add the rest of the ingredients and mix well until combined
  4. Spoon the mixture into the cases - just half full. Bake for 15-20 mins. They will be golden brown and when tested with cake skewer, it comes out clean when they are ready.
  5. Remove from oven, cool on a wire tray and try to resist for 10 minutes.
  6. Use an apple corer and a tiny teaspoon to carefully remove a plug from the centre of each cupcake. Fill the hole with good raspberry jam.
  7. Make the icing by sifting icing sugar into a bowl and stirring in the lemon juice. Carefully spoon it onto the top of each cake and try to cover the top of each cupcake neatly. (I failed to do this to Holly's standards, but will try harder next time)
  8. Add a fresh raspberry onto the centre of each cupcake and enjoy!


Info for other GBBO junkies:
Be sure to read Red, Red's blog on cupcakes.
For info on the contestants: Maison Cupcake
Holly's blog
Mary-Anne's blog
Jo's blog
BBC food blog
Miranda (from series1)
Jason's blog

Need the book?
Available at Amazon


Want to watch the show from outside the UK? Find the link here

Let me know if you get hooked on it too.


Sunday, 11 September 2011

Sloe Pickings


The hedgerows around our house are offering us the double pleasure of blackberries and sloes at the moment. 

Don't let these blueberry lookalikes fool you - they are not something to pick and eat from the bush... far too bitter.
 But if you happen to have a litre of gin going begging, then it is simple to make a delicious liqueur with sloes. If you start now, you can be ready to serve at Christmas. 

Image: Ingrid
Recipe:
  1. Pick approx 500g of sloes from mid September through to October. Wash them.
  2. Prick each sloe a couple of times with a needle. (This lets the juices out and the gin in.)
  3. Find a glass jug or jar (which holds in excess of 1 litre)
  4. Add the sloes, 220g of caster sugar and 1 litre of gin.
  5. Stir/shake well and cover.
  6. Leave in a dark place and shake/stir every other day for one week.
  7. Now just shake once a week for 2 months.
  8. Strain the liquid through a muslin cloth and pour into a sterilised bottle. 
Some people recommend leaving the sloe gin for a year but I don't have that much patience.
Christmas 2011 will hopefully see this on our table. You are welcome to drop by if you're passing.
Maybe I'll get another litre soaking in October and keep that for next year.

Image: Ingrid
Sloe Facts:
Sloes grow on the blackthorn bush, and are found in Europe, New Zealand and eastern North America
The fruits are best picked in late September and October, especially after the first frost. 

Image: Ingrid

Hope you can find some sloes to marinate or a local fruit to create a delicious tipple for the winter months. Love to hear if you do anything similar in your part of the world.

Thursday, 8 September 2011

I don't want to force you ...

But now is the time for action if, like me, you love to have hyacinths blooming on your windowsill in the middle of winter.


Images: IKEAAbsolutely WhiteAnetteshus, Sad Ferret

Reading the autumn edition of Sarah Raven's inspiring garden catalogue made me realise that mid September is the deadline for forcing some hyacinth bulbs of my own.
In the past I just bought the hyacinth plants in winter and had one or two on my windowsill.

This year I am thinking abundance, and abundance hyacinth-buying in December is expensive. Hence the bulb catalogues and the haste to order.
Actually we only have to rush if we want them flowering at Christmas, as it takes 14 weeks to get your dormant bulb into flower.

I really love the way a few hyacinths on your windows in January bring colour and scent to the house once the Christmas decorations are put away.

If you want to try a little forcing along with me, these are the basics:

  1. Order bulbs from catalogue or buy from garden centre.                                                                        I recommend Sarah Raven and Peter Nyssen for fellow Brit readers. (I love the photos in Sarah's and the prices in Peter's!)
  2. Use special bulb fibre to fill your container about three quarters full. You can also grow the bulbs without fibre, in a special glass vase filled with water.
  3. Place the hyacinth bulbs in individual pots or closely together in a larger pot.
  4. Add  enough bulb fibre to barely cover the top of the bulb and water the pot.
  5. Pre-chilling: Now your pots need to be chilled for 12 weeks at a temperature under 40F / 5C ...but above freezing! You can do this in a fridge - but if you are going for abundance like me, this is a non starter. They are best in a cool, dark garage or shed. 
  6. Forcing: After 12 weeks bring the pots inside for blooming. First, water thoroughly and then keep them in a COOL place for 2 weeks. (No worries if it is not very light at this point). Just don't over water.
  7. When the shoots are 4-6 inches (10-15cm), move the bulbs to a slightly warmer and lighter place. Best to force slowly rather than shock them with a blast of heat. 
  8. After blooming, the bulb cannot be forced again next year. Either add to the compost heap or tenderly nurture it and plant in the garden in autumn.
Read more here and here to get the full story of forcing a hyacinth to bloom.
Image: Sad Ferret
I'm off now to get ordering, I going to be all white this year. Maybe there will even be one in a tea cup.


Monday, 22 August 2011

What can I do with a marrow?

Ever asked the question "What can I do with a marrow?"?
Translation for the USA "What can I do with a summer squash?"

My answer is "Stuff it!"


Marrows are like London busses, one minute your garden is barren and the next minute there are loads of them coming along.
Yesterday I stuffed my first one and it was rather tasty, if I say so myself.
In case you feel tempted to stuff one yourself, this is how I did it.

Stuffed Marrow with Chorizo and Couscous


1 large marrow (summer squash)
100g chorizo sausage, sliced and chopped
1 red onion
mushrooms, chopped - 3 big ones or more smaller
1 cup of dry couscous
1 lemon - juiced
1 red pepper, chopped small
2 red vine tomatoes, chopped
big handful of fresh parsley
clove of fresh garlic, squashed
grated cheese for topping
2TBsp extra virgin olive oil
a bit of spice e.g. Ras el hanout or paprika

Action:

  1. Preheat oven to 200C/ 390F/Gas 6
  2. Cut the marrow in half lengthways. Peel the skin off and scoop out all the seeds and pith from centre (discard). Sprinkle salt over the marrow and leave for half an hour. This draws out any bitter juices from your marrow. After half an hour rinse the salt off the marrow and pat dry.
  3. Add the cup of dry couscous to a medium/large bowl, pour over the juice of one lemon and then add enough boiling water to just cover the couscous. Cover the bowl with cling film and leave until all the liquid is absorbed.
  4. Chop the onion up small and add it together with the chopped chorizo to your large fry pan in which you have heated about 2 Tbsp of olive oil. Fry for a few mins till the onion is softened but not brown.
  5. Add the chopped red pepper, tomato and garlic and fry for a couple of mins and then add the mushrooms frying for a couple more mins. Take off the heat.
  6. Once the couscous has absorbed the liquid, fork it over lightly and add the fried chorizo/vegetable mixture to the bowl too. Add a large handful of chopped parsley and a little of a spice that you fancy. I had some Ras el hanout to hand (Moroccan spice mix) but could have added a dash of paprika or cumin. Experiment!
  7. Lay your two marrow halves in an oven proof dish and fill both halves with all the mixture. Sprinkle some grated cheese on top of each half and pop into the oven at 200C. I prefer to cover mine with foil for 20 mins and then take the foil away and leave it to brown nicely for another 15-20 mins.
  8. No two marrows are the same, so you need to test the marrow with a sharp knife to judge how long to cook it. The flesh should be soft but firm. It took longer than I expected so don't be taking it out too soon and blaming me because you ended up eating raw marrow!
Serve this with a nice green salad and some crusty bread and you have enough to feed 4 gannets or up to 8 with modest appetites.
Variations: add feta cheese, pine nuts, chopped fennel bulb, raisins, chopped apricots, mix up the herbs with mint, oregano and basil. So many possibilities to be adventurous with.

Love to know if you try it and like it.
Thanks AWT at the BBC for the inspiration. 
Even though in his photo you can see the marrow in raw and unpeeled! 


Subscribe via email

Enter your email address:

Delivered by FeedBurner

You may also like

Related Posts Plugin for WordPress, Blogger...