Tuesday 20 September 2011

Four weeks to make a loaf

Ever thought about making sour dough bread?

It is a whole year since I bought the delectable Bourke Street Bakery recipe book, but the many pages of instructions on how to make a sour dough starter left me a non-starter. In my naiveté, I had imagined the stages would be: buy the book, make a yeasty mix, wait a couple of days and then have sour dough bread for ever more. How wrong I was!

Always on the look-out for a shortcut, I searched in earnest for a starter that I could buy instead of the four week long slog involved in creating a sour dough from scratch.

If I lived in the US, it would have been easy to spend $12 and have a starter mailed to me, but here in the UK I found just one vendor, and their website said they were on holiday for 3 weeks and could not send starter dough out till September.

Being impetuous,  I reached for the Bourke Street Bakery book again and decided that it couldn't be that difficult, so why not give it a go.
To cut a long story short, that was 4 weeks ago.

After an "intensive pregnancy", during which my sour dough grew vigorously, it finally gave birth to triplets. Making their debut... my home baked, Suffolk sour dough loaves.
Image: Ingrid's iphone
The unbiased verdict of the extended family and friends was a reassuring "delicious".

But I am still shell-shocked at how much work was involved. It's like feeding the dog: done daily or else there are complaints.

Image: Ingrid with iPhone and Strip designer
Back in August I started with one bowl, a packet of organic flour and filtered water.
Now, four weeks later I have loaves, a four-week old wild yeast starter begging to be fed and a family waiting for a new loaf.
If anyone is keen to try this for themselves I can supply the starter but you will had to come and collect it!

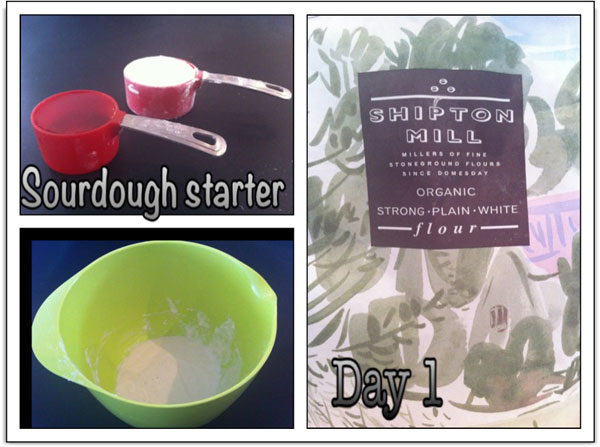
The basic principle is that by mixing strong flour and water together you can capture wild yeasts that are floating around in the air. Having captured your wild yeasts, you need to feed them daily with more flour and water.
This will double the size of your mix EVERY day. So after four days you either have to bin the excess or make sour dough pancakes (which are delicious).

This process is repeated on a daily basis for THREE weeks. After two weeks I nearly got in the bin...
And just when my flour was running low, I realised that the "greedy monster" had to be fed three times on the final day to make it strong enough to raise the dough.

Four hours after the last feed, it had to be knocked down, then placed in a fridge for 12 hours to retard it before taking it out and activating it again. Poor dough didn't know whether it was coming or going ... and neither did the baker.

The upshot is I have decided to go on a one-day course at The Virtuous Bread - there has to be an easier way to get my sour dough started!

If you have baked with sour dough and have any tips for a novice, I would love to hear from you!


Thursday 15 September 2011

Best cupcakes ever

If you can't watch BBC television - you are missing a real treat. In fact I would venture to say, "You are missing the best show ever"...The Great British Bake Off.
I am so happy to be in England now that Series 2 is showing. 

To ease the distress of having to wait one whole week for the next episode, we started searching online for ways to keep baking feeling going. 
The Bakewell tart cupcake recipe ticked all the boxes for our first attempt from the BBC website.
Holly Bell inspired us to try her recipe, albeit our way - with less than perfect icing (sorry Holly).
Holly and Janet are my favourite contestants - hope they stay in till the final.

It was love at first taste. 
These Bakewell tart cupcakes are the easiest and tastiest we have ever made.


 Alice and Louise carefully scooped out a little hole in the centre, to be able to drop a tiny dollop of raspberry jam. Tilly was on hand to eat every little crumb that was removed - and let them know if they were not quick enough to supply her.


Twelve cupcakes quickly disappeared


Here is Holly's recipe with a couple of changes :


Raspberry Bakewell Tart Cupcakes
The mix:
75g margarine - at room temp
75g butter- at room temp
150g caster sugar
100g self-raising flour
3 free range eggs- at room temp
1 teaspoon baking powder
60g ground almonds
1 Tbsp milk

After baking:
good quality raspberry jam

Icing:
200g icing sugar
2-3 Tbsp lemon juice
12 raspberries

How to:

  1. Preheat oven to 180C/350F/Gas4. Use paper cases in a 12 hole muffin tin.
  2. Cream the margarine and butter in a bowl till light and fluffy. (I thought this was a typo as I always have creamed butter and sugar together first - but now I think this makes the cupcakes extra light)
  3. Add the rest of the ingredients and mix well until combined
  4. Spoon the mixture into the cases - just half full. Bake for 15-20 mins. They will be golden brown and when tested with cake skewer, it comes out clean when they are ready.
  5. Remove from oven, cool on a wire tray and try to resist for 10 minutes.
  6. Use an apple corer and a tiny teaspoon to carefully remove a plug from the centre of each cupcake. Fill the hole with good raspberry jam.
  7. Make the icing by sifting icing sugar into a bowl and stirring in the lemon juice. Carefully spoon it onto the top of each cake and try to cover the top of each cupcake neatly. (I failed to do this to Holly's standards, but will try harder next time)
  8. Add a fresh raspberry onto the centre of each cupcake and enjoy!


Info for other GBBO junkies:
Be sure to read Red, Red's blog on cupcakes.
For info on the contestants: Maison Cupcake
Holly's blog
Mary-Anne's blog
Jo's blog
BBC food blog
Miranda (from series1)
Jason's blog

Need the book?
Available at Amazon


Want to watch the show from outside the UK? Find the link here

Let me know if you get hooked on it too.


Sunday 11 September 2011

Sloe Pickings


The hedgerows around our house are offering us the double pleasure of blackberries and sloes at the moment. 

Don't let these blueberry lookalikes fool you - they are not something to pick and eat from the bush... far too bitter.
 But if you happen to have a litre of gin going begging, then it is simple to make a delicious liqueur with sloes. If you start now, you can be ready to serve at Christmas. 

Image: Ingrid
Recipe:
  1. Pick approx 500g of sloes from mid September through to October. Wash them.
  2. Prick each sloe a couple of times with a needle. (This lets the juices out and the gin in.)
  3. Find a glass jug or jar (which holds in excess of 1 litre)
  4. Add the sloes, 220g of caster sugar and 1 litre of gin.
  5. Stir/shake well and cover.
  6. Leave in a dark place and shake/stir every other day for one week.
  7. Now just shake once a week for 2 months.
  8. Strain the liquid through a muslin cloth and pour into a sterilised bottle. 
Some people recommend leaving the sloe gin for a year but I don't have that much patience.
Christmas 2011 will hopefully see this on our table. You are welcome to drop by if you're passing.
Maybe I'll get another litre soaking in October and keep that for next year.

Image: Ingrid
Sloe Facts:
Sloes grow on the blackthorn bush, and are found in Europe, New Zealand and eastern North America
The fruits are best picked in late September and October, especially after the first frost. 

Image: Ingrid

Hope you can find some sloes to marinate or a local fruit to create a delicious tipple for the winter months. Love to hear if you do anything similar in your part of the world.

Thursday 8 September 2011

I don't want to force you ...

But now is the time for action if, like me, you love to have hyacinths blooming on your windowsill in the middle of winter.


Images: IKEAAbsolutely WhiteAnetteshus, Sad Ferret

Reading the autumn edition of Sarah Raven's inspiring garden catalogue made me realise that mid September is the deadline for forcing some hyacinth bulbs of my own.
In the past I just bought the hyacinth plants in winter and had one or two on my windowsill.

This year I am thinking abundance, and abundance hyacinth-buying in December is expensive. Hence the bulb catalogues and the haste to order.
Actually we only have to rush if we want them flowering at Christmas, as it takes 14 weeks to get your dormant bulb into flower.

I really love the way a few hyacinths on your windows in January bring colour and scent to the house once the Christmas decorations are put away.

If you want to try a little forcing along with me, these are the basics:

  1. Order bulbs from catalogue or buy from garden centre.                                                                        I recommend Sarah Raven and Peter Nyssen for fellow Brit readers. (I love the photos in Sarah's and the prices in Peter's!)
  2. Use special bulb fibre to fill your container about three quarters full. You can also grow the bulbs without fibre, in a special glass vase filled with water.
  3. Place the hyacinth bulbs in individual pots or closely together in a larger pot.
  4. Add  enough bulb fibre to barely cover the top of the bulb and water the pot.
  5. Pre-chilling: Now your pots need to be chilled for 12 weeks at a temperature under 40F / 5C ...but above freezing! You can do this in a fridge - but if you are going for abundance like me, this is a non starter. They are best in a cool, dark garage or shed. 
  6. Forcing: After 12 weeks bring the pots inside for blooming. First, water thoroughly and then keep them in a COOL place for 2 weeks. (No worries if it is not very light at this point). Just don't over water.
  7. When the shoots are 4-6 inches (10-15cm), move the bulbs to a slightly warmer and lighter place. Best to force slowly rather than shock them with a blast of heat. 
  8. After blooming, the bulb cannot be forced again next year. Either add to the compost heap or tenderly nurture it and plant in the garden in autumn.
Read more here and here to get the full story of forcing a hyacinth to bloom.
Image: Sad Ferret
I'm off now to get ordering, I going to be all white this year. Maybe there will even be one in a tea cup.


Subscribe via email

Enter your email address:

Delivered by FeedBurner

You may also like

Related Posts Plugin for WordPress, Blogger...